# Using Chainguard Containers in Dev Containers
URL: https://chainguard-docs-preview-git-fix-ai-metadata-year.chainguard.app/chainguard/containers/using-and-deploying/dev-containers.md
Last Modified: October 8, 2026
Tags: Chainguard Containers
Guide outlining how you can use Chainguard Containers as Dev Containers for secure development.
[Development Containers](https://containers.dev/) — sometimes known as "dev containers" — allow you to use a container as a development environment where you can run applications and separate tools, libraries, or runtimes. Dev containers can also help with testing and continuous integration.
With a few changes, the images based on Wolfi and maintained by Chainguard provide distroless images that can be used as dev containers. This guide outlines how you can set up a Chainguard image as a dev container in VS Code.
**What is distroless**
Distroless container images are minimal container images containing only essential software required to build or execute an application. That means no package manager, no shell, and no bloat from software that only makes sense on bare metal servers.
**What is Wolfi**
[Wolfi](https://github.com/wolfi-dev/) is a community Linux undistro created specifically for containers. This brings distroless to a new level, including additional features targeted at securing the software supply chain of your application environment: comprehensive SBOMs, signatures, daily updates, and timely CVE fixes.
**Chainguard Containers**
[Chainguard Containers](https://www.chainguard.dev/chainguard-images?utm_source=cg-academy&utm_medium=referral&utm_campaign=dev-enablement) is a mix of distroless and development container images based on Wolfi. Daily builds make sure images are up-to-date with the latest package versions and patches from upstream Wolfi.
## Prerequisites
To follow along with this guide, you will need to have the following:
* A compatible Integrated Development Environment (IDE) or other tool. Here is a list of [supported editors and tools](https://containers.dev/supporting).
* Note that this guide was validated using [Visual Studio Code (VS Code)](https://code.visualstudio.com/).
* A Docker server to connect to. A local installation of Docker Desktop will usually suffice for demonstration purposes, but you can find full instructions in this guide on [Developing inside a Container](https://code.visualstudio.com/docs/devcontainers/containers) in the VS Code documentation.
* This guide's first example assumes that you have a GitHub repository named `empty`. You can follow GitHub's [Quickstart for repositories](https://docs.github.com/en/repositories/creating-and-managing-repositories/quickstart-for-repositories) for information on setting this up.
## What are Dev Containers?
A development container is a container in which a user can develop an application. Development containers are isolated environments that allow developers to work on applications with all the necessary dependencies, tools, and configurations pre-packaged. These containers ensure that the development environment is consistent across different systems, avoiding the "works on my machine" problem.
In order to run a dev container, the given project must contain a file named `devcontainer.json`. This is a special file defined by the [Development Container Specification](https://containers.dev/implementors/json_reference/) which holds all the metadata necessary to configure the dev container.
Although there are many reasons why production images should be secure, the reasons for concern about the security of development environments are less clear. Put briefly: the code you've written and tested in your development environment will eventually make it into your production environment. If you've been hacked during development, then perhaps the hackers' code goes into production as well.
Chainguard offers minimal runtime images designed for running production workloads, and development images that contain a shell and some development tooling. With that said, both development and production images are slimmed down and updated regularly to be free of CVEs. Because of their minimal and secure-by-default nature, Chainguard's container images are ideal for use in a secure development process.
## Building a Go Dev Container using an example repository
The following is an example of how to set up a dev container using a Go project. Here, we will take the content of the `chainguard-go-devcontainer` directory in [Chainguard's demo GitHub repository](https://github.com/chainguard-dev/edu-images-demos) and push it to the root of an empty repository.
Start by cloning the repository:
```shell
git clone https://github.com/chainguard-dev/edu-images-demos.git
```
Then navigate into the `chainguard-go-devcontainer` example directory:
```shell
cd edu-images-demos/chainguard-go-devcontainer
```
From there, Initialize a Git repository:
```shell
git init .
```
Then add all the files there, including any hidden files:
```shell
git add * .??*
```
Commit the changes:
```shell
git commit -am "Initial Commit"
```
Add a GitHub repository that you have control over as a remote named `origin`. This example assumes that the repository is named `empty` but you can use any empty GitHub repository you have created:
```shell
git remote add origin https://github.com/$YOUR-GITHUB-PROFILE/empty.git
```
Be sure to change `$YOUR-GITHUB-PROFILE` to reflect the name of your GitHub profile.
Finally, push the commit to the remote repository you just configured:
```shell
git push -fu origin main
```
Following that, if you open VS Code on this directory you will be prompted to open the project in a dev container.
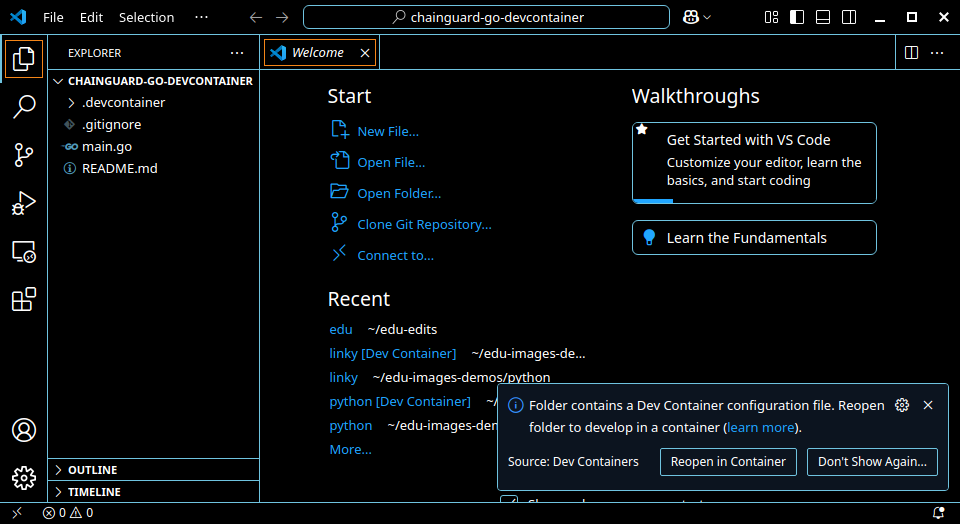
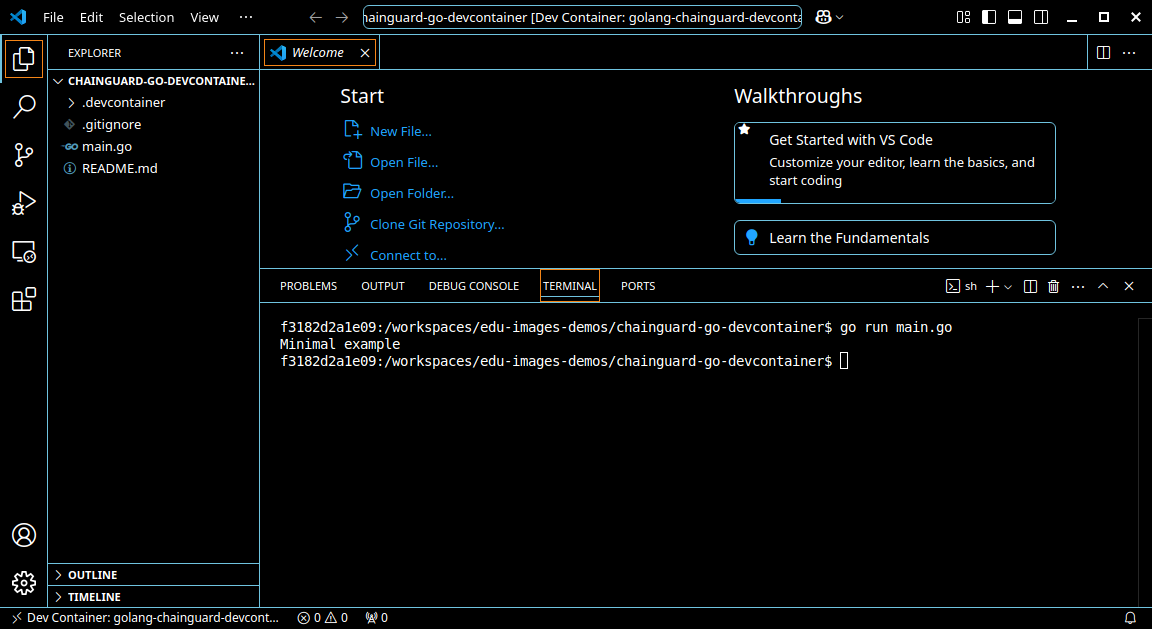
If you do reopen the project in a dev container it may take a minute or so to build the first time you use it. Open a terminal and you can run the sample project, even if you don't have Go installed on your local machine:
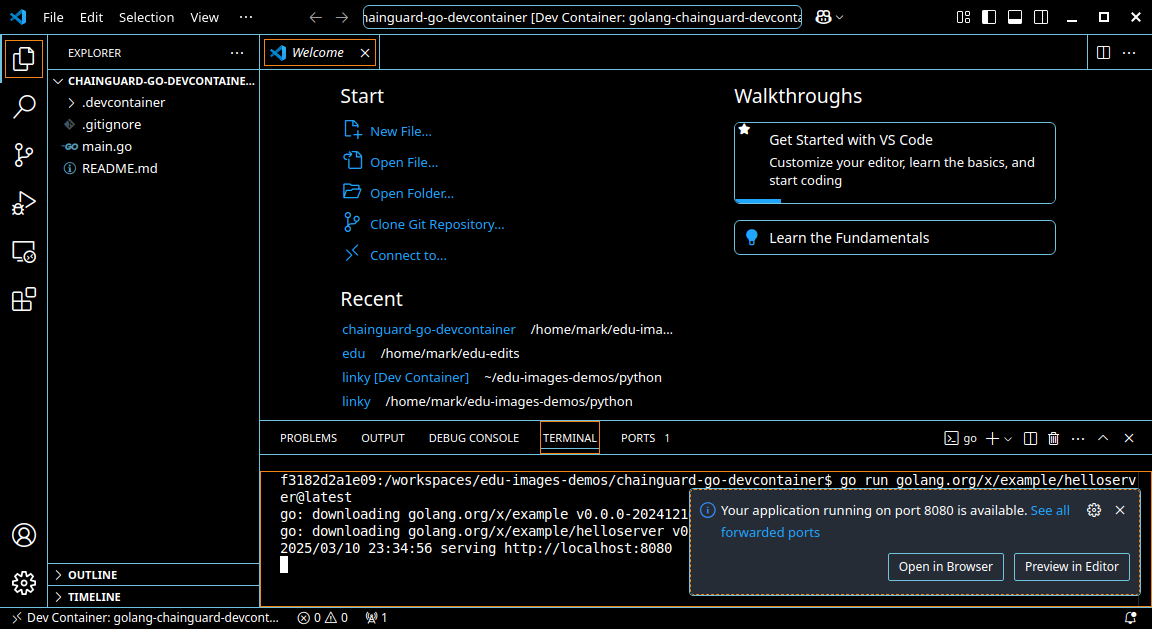
If you run a webserver in your dev container you will be asked if you want to open the port in a local browser. Exactly as if you were running in a local container:
## Building a Dev Container in other languages
If you want to develop in languages other than Go, you'll need to use a different base image. Note that to do this, you'll need a working knowledge of Dockerfiles, Docker builds, JSON, as well as how your chosen language installs libraries or packages.
There are a couple of different ways to set this up, and the exact configuration used in the following example is not strictly required as long as certain requirements are met. This example sets up a Python project and uses a `Dockerfile` and `devcontainer.json` in a `.devcontainer` directory. This has the advantage of keeping the code separate from the dev container configuration.
Assuming you're starting from a project with no dev container, you'll first need to create the requisite files and folders.
Start by creating a directory named `.devcontainer` and navigate into it:
```shell
mkdir .devcontainer && cd $_
```
Next, create a dev container configuration file named `devcontainer.json` with the following command:
```shell
cat > devcontainer.json < Dockerfile <> /etc/sudoers && echo y | pwck -q || true
```
## Usage notes
[GitHub CodeSpaces](https://github.com/features/codespaces) support dev containers. However, at present they only work when the config is stored at the root directory.
The IDE should pass your keys through to the dev container using `ssh-agent` and `gpg-agent`. For this reason, you may need to install GPG or SSH tools inside the container.
Please refer to the VS Code page on [advanced usage](https://code.visualstudio.com/remote/advancedcontainers/sharing-git-credentials) for more information.
## Conclusion
You should now have a development environment that does not require packages to be installed on your local machine and will run the same for anyone working on your project.
You may want to add things like linting rules or other components to your dev container config. The [VS Code website](https://code.visualstudio.com/docs/devcontainers/containers) has many resources on working with dev containers which you may find useful.